


Git & GitHub are some of the most important and useful tools for developers. In this article, I'll show a step by step process for getting started with Git & GitHub for newbies
What is Git & GitHub
Git is a Powerful, open-source version control system/tool which helps in tracking changes or history of any set of files. For developers, git provides absolute freedom to control & manage their code. Git itself is a vast topic to discuss but as a beginner, we keep it as short as that.
GitHub is the platform where we host our code for flexibility of accessing it from anywhere or collaboratively work using a version control system like Git. There are many platforms like GitHub are GitLab, BitBucket, etc. There is a misconception in newbies that they think git & GitHub is the same but as we discussed git is the version control system and GitHub is a could base hoisting platform as simple as that.
Why Should We Use Git & GitHub
There are enough reasons for using or working with git & GitHub. If you are building something in your local machine you should push it on GitHub so everyone can see it and improve or suggest some edits on it. Otherwise, it helps in teamwork, keeping the history of the project, controlling versions, etc.
Download & Configuration of Git
First, we need to download and install git in our local system to work with git. Go to this site and download Git according to your OS.
For Windows users install git bash terminal for working with git.
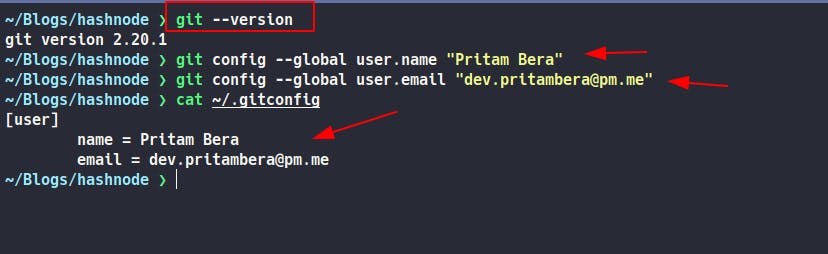
After successful installation, run git --version for conformation
Now run these commands for adding name and email in git
$ git config --global user.name "Your Name"
$ git config --global user.email "Your E-mail"
$ git config --global color.ui auto
Pro TipYou can manually change these later by changing "gitconfig" file located on ~/.gitconfig or ~/.config/git/config
if You check the .gitconfig file you'll see your name and email registered
 Now our initial Git SetUp has been done.
GitHub Setup
Head over to GitHub & Create an account with the same E-mail. Now we have to create a bridge between our local machine & GitHub account so we can push our files. Now we can achieve this by simple PasswordAuthentication. But in this walkthrough, we'll go one step forward and use SSH Authentication. This is a two-step simple process
- SSH keypair generation
- Adding the public key in Github
SSH keypair generation
If you don't know anything about SSH, read this for a basic understanding. For key pair generation, open your terminal and type this command
$ ssh-keygen -t ed25519 -C "your comment"
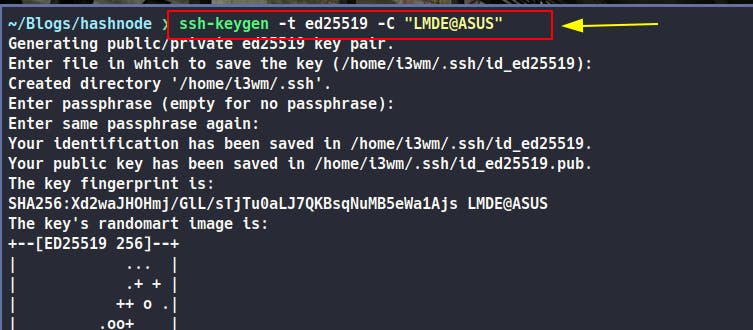 and press enter. In the
 ~/.ssh directory you can see there are to files named id_ed25519(private key ) & id_ed25519.pub(public key) are genarated.

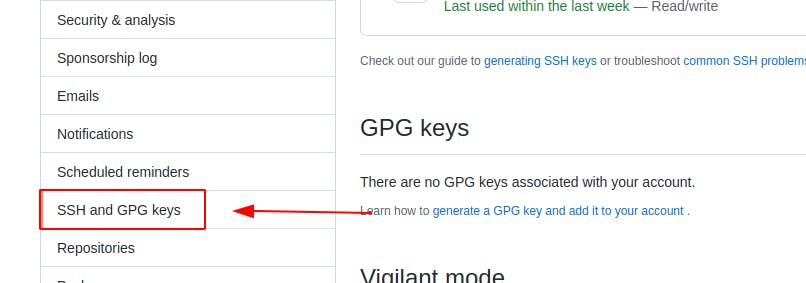
Adding SSH public key on Github
From the top right dropdown of your GitHub account, open Settings and then SSH & GPG Keys
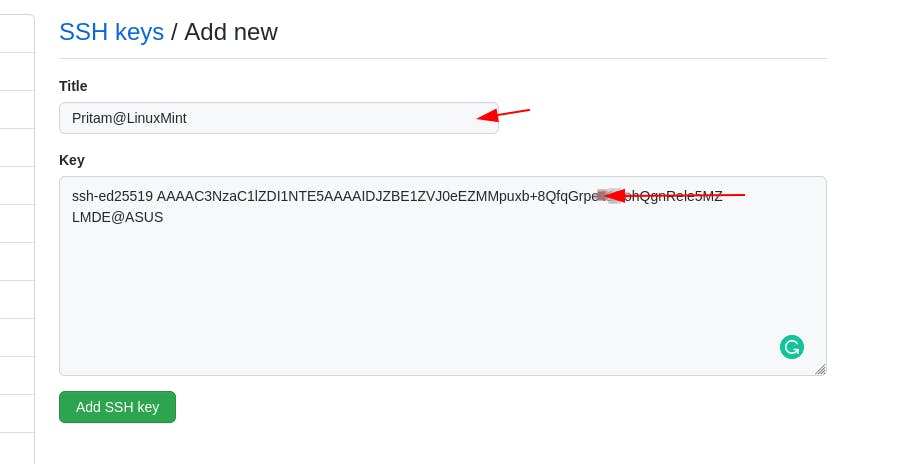
 Keys then click over "New SSH Key". Give a Title and paste the file content of
 id_ed25519.pub located on ~/.ssh/id_ed25519.pub in the Key section
We are all set now. let's move on to our first contribution
Pushing Local Project
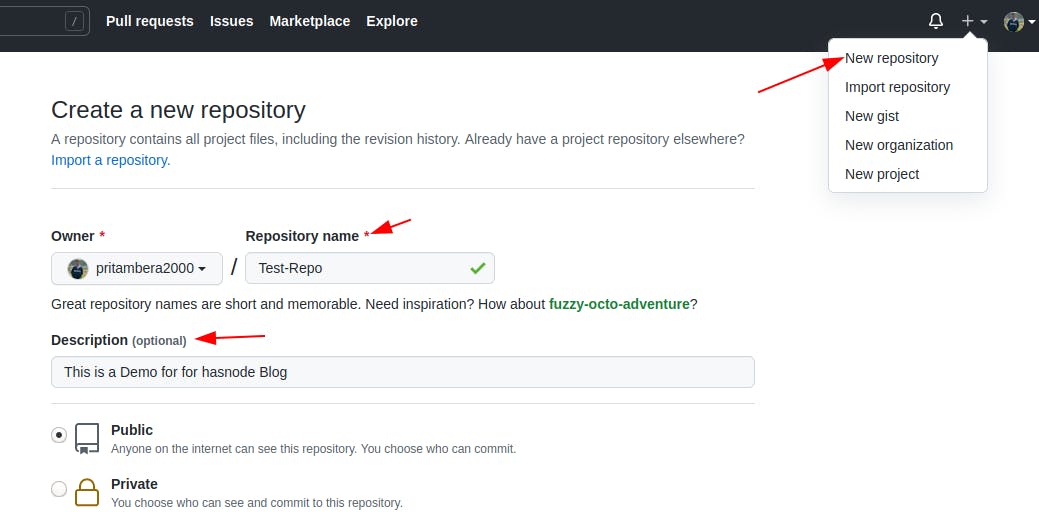
In GitHub Create a new repository, give a title and description
- In your local machine open the terminal go to the project directory and type
git init - Add SSH URL of your GitHub repo by this command
git remote add origin <url> - Add all files
git add .orgit add -A - commit all files
git commit -m "my meaningful commit message" - changing default branch as main
git branch -M main - push on GitHub
git push -u origin main
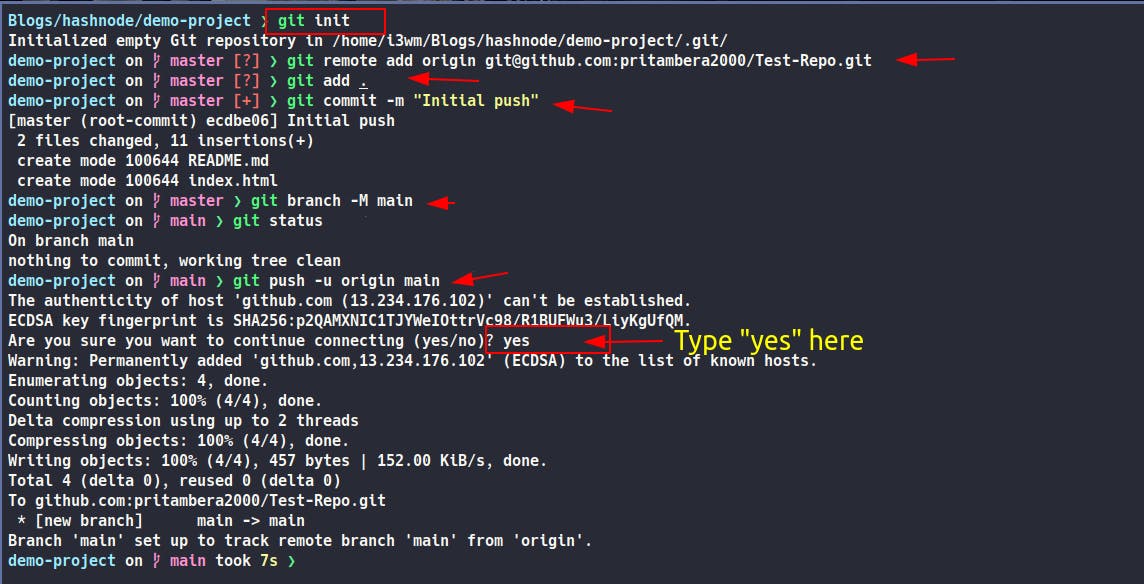
We successfully pushed our project in github
Some useful Git commands
$ git status // status of your changes
$ git branch   //shows all branches
$ git branch bug-fix   // creates a new branch named bug-fix
$ git checkout bug-fix   // switches branch to bug-fix
$ git checkout -b dev   //creates and switch to branch named dev
$ git remote -v   // shows origin URLs
$ git remote set url origin <URL>  // changes origin URL
$ git log // logs recent commits & activities